How To Install Private Internet Access on Windows (2026)
- A Beginner-Friendly Guide to Installing Private Internet Access on Windows
- Setting Up PIA Using Windows' Built-in VPN Settings
- Optimizing PIA TAP Adapter Priority
- Configuring PIA With WireGuard
- Using PIA With the Native OpenVPN App
- Installing PIA on a Windows Server
- Common PIA Installation Issues and Solutions
- How to Uninstall PIA Completely From Windows
- FAQs
Installing Private Internet Access (PIA) on Windows is generally simple, thanks to its native Windows app. Once installed, the app makes it easy to connect to a server, configure settings, and keep your internet activity secure and private.
I’ve created step-by-step guides for each PIA installation method, including advanced setups and troubleshooting tips. If you want to avoid using the native app due to personal preferences, resource considerations, or compatibility issues with your system, this article covers it.
A Beginner-Friendly Guide to Installing Private Internet Access on Windows
The easiest way to install PIA on Windows is to install its desktop application from the official website. Below, you can also find detailed steps for different installation methods, from basic to advanced configurations.
1. Open PIA's website
Visit the Private Internet Access website and click on the Download VPN section at the top of the page. Select Windows VPN from the drop-down menu, and click Get PIA VPN for Windows to subscribe. If you already have an account with PIA, click on Download PIA VPN for PC to save the installer file (pia-installer.exe) to your computer.
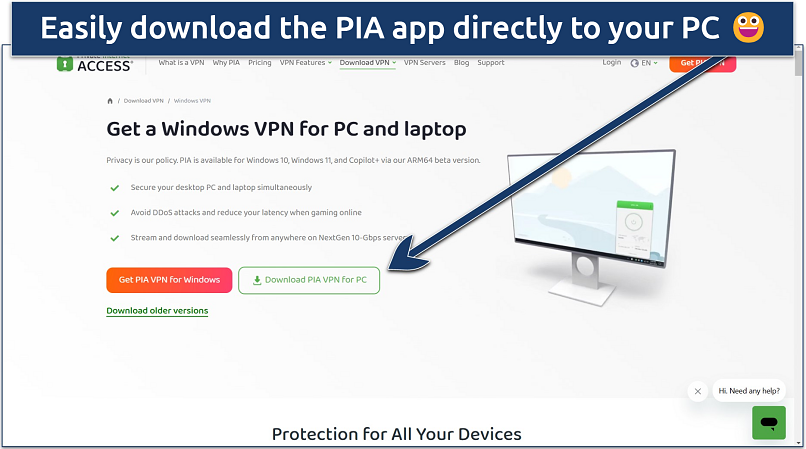 You can also find older app versions here if PIA is malfunctioning after an update
2. Create an Account
To register, you only need to provide a valid email address and payment method. PIA offers monthly, yearly, and multi-year options. Long-term options offer significant savings, but all options include unlimited simultaneous connections, military-grade encryption, and access to an extensive network of 29,650 servers in 90 countries.
You can pay with major credit cards, PayPal, and cryptocurrencies like Bitcoin, Ethereum, or Litecoin. Alternative payment methods such as Amazon Pay, Google Pay, and Apple Pay are also available, depending on your region. Additionally, PIA’s offers come with a 30-day money-back guarantee, so you can get a full refund if you cancel.
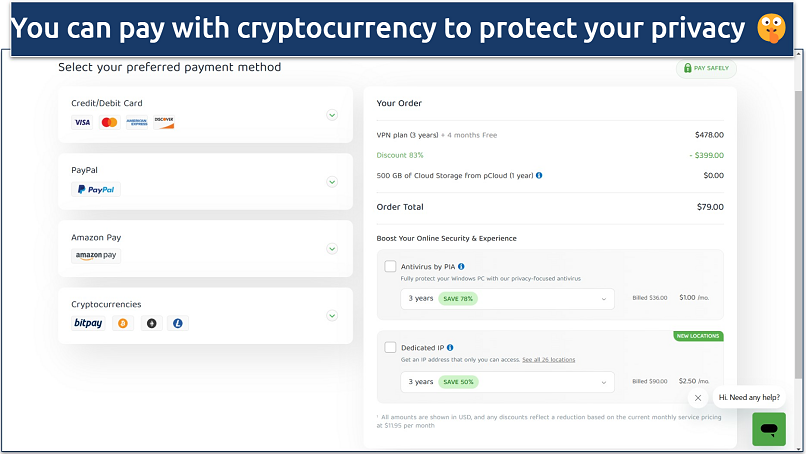 You don't need to provide personal data to sign up
After paying for your offer, you’ll receive a confirmation email from PIA containing your username and password. Store this data securely, as you’ll need them to log in.
3. Install the Software
Locate the downloaded file (usually in your Downloads folder) named something like “pia-installer.exe.” Run it, then click Yes if prompted by User Account Control (UAC) and wait for the installation to complete. During testing, it took me less than 4 minutes to download and install PIA on my Windows PC.
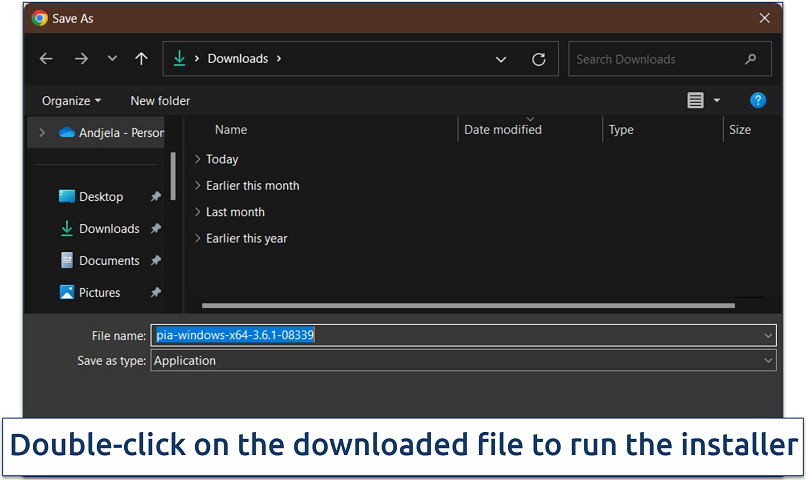 You can choose another download location if you prefer
4. Log In to Your Account
Open the app and log in using your PIA username and password. You can use a password manager to save your credentials, so you don’t lose access to your account.
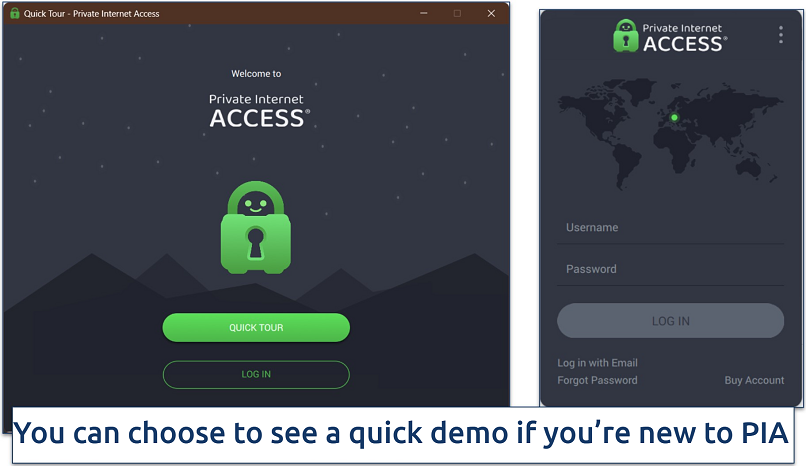 You can also log in with email if you've lost your login data
5. Connect to a Server
Choose a server location from the list and click Connect. The interface will confirm when the VPN is active, and your IP address will change. To ensure the VPN is working, verify that the displayed IP address matches the VPN’s server location. You can also use an IP leak test tool to confirm there are no DNS or WebRTC leaks.
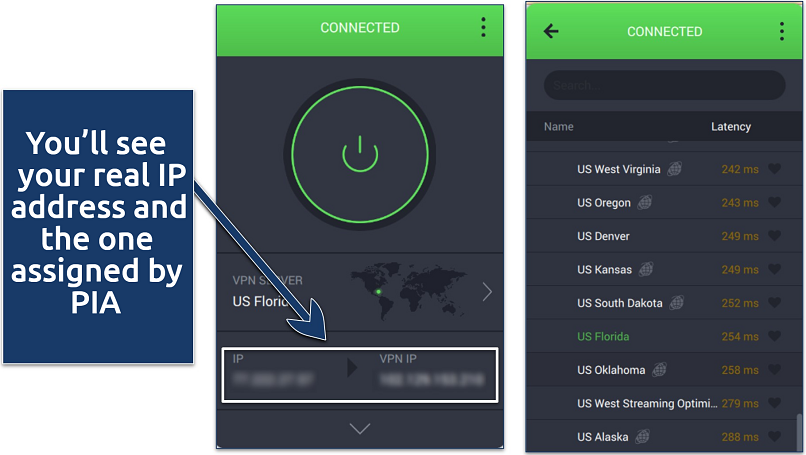 PIA has servers in every US state
6. Adjust Settings (Optional)
Open the settings menu to customize features like auto-connect, advanced kill switch, split tunneling, and encryption levels. Click the gear or hamburger menu icon within the PIA interface and set preferences:
- Auto-connect. Enable this if you want PIA to start automatically when Windows boots.
- Kill switch. Automatically enabled, this feature blocks internet traffic if your connection unexpectedly times out. Go to Advanced Settings to choose the Advanced Kill Switch, which blocks any traffic going outside the secure VPN tunnel, even when PIA isn't turned on.
- Split tunneling. Open PIA's settings menu and find the Split Tunnel section. Add applications that need VPN protection while letting others use your regular connection. This provides better speeds since not all traffic gets encrypted.
- Encryption level. Adjust the encryption settings for faster speeds (128-bit) or stronger security (256-bit).
- Ad-blocking (PIA MACE). Enable PIA MACE in settings to block ads, trackers, and malware.
- Launch on startup. Configure PIA to start with Windows, so you don’t need to remember to turn it on each time.
- Port forwarding. PIA’s port forwarding improves torrenting speeds by enabling more peer connections and can enhance gaming performance by reducing latency and improving stability. It’s also useful for remote access to devices or services, such as hosting servers or using smart home applications, while keeping your traffic secure.
Setting Up PIA Using Windows' Built-in VPN Settings
In some cases, Windows' native VPN options may be required for specific network configurations. This is especially true in enterprise setups or when third-party apps conflict with certain firewalls or security policies. You can also do this as a regular user if you prefer to avoid installing extra software or want to keep things as lightweight as possible.
Manual setup takes a bit longer but offers more control over your connection. However, keep in mind that you may lose access to advanced features like the kill switch or ad-blocking tools available in the PIA app.
1. Gather your PIA VPN details Log in to your PIA account on its website and locate the Manual Setup section. You’ll need the server address, username, and password to configure the VPN connection. Make sure to note down the VPN protocol recommended by PIA (usually OpenVPN, IKEv2, or L2TP).
2. Open VPN settings in Windows.
- Press Windows + I to open the Settings app.
- Go to Network & Internet and select VPN from the left menu.
- Click Add a VPN connection.
3. Configure the VPN. In the Add a VPN connection window, start by selecting Windows (built-in) as the VPN provider. Next, give your connection a name (e.g., "PIA VPN"). Enter the server address provided by PIA in the appropriate field, and choose the VPN protocol for the VPN type. For the sign-in info, select Username and password, then enter your PIA username and password in the respective fields.
4. Connect to the VPN. After saving the VPN connection, go back to Settings > Network & Internet > VPN. Select the VPN you just created, click Connect, and enter your PIA username and password when prompted. Once connected, you’ll see a status that shows you're securely browsing with PIA’s VPN.
Optimizing PIA TAP Adapter Priority
This setup is to improve security and privacy by preventing other network adapters from overriding your internet traffic. It enhances connection stability and can boost VPN speed by prioritizing traffic through the VPN tunnel over your regular connection.
1. Open Network & Internet Settings. Right-click the Network icon in the system tray (bottom-right corner of your screen, near the clock). Then select Network & Internet settings from the menu that appears.
2. Change adapter options. In the Network & Internet settings window, scroll down and click on Change adapter options. This will open a window showing all your network connections, including WiFi, Ethernet, and VPN connections.
3. Find the PIA TAP adapter. It will usually be named something like TAP-Windows Adapter or PIA TAP Adapter. This is the virtual adapter that connects your VPN to your network.
4. Set the TAP adapter priority.
- Right-click the PIA TAP Adapter and select Properties.
- In the Properties window, click on the Networking tab.
- Click the Internet Protocol Version 4 (TCP/IPv4) entry, then click Properties.
- In the new window, select Advanced.
- Under the Advanced TCP/IP Settings, go to the IP Settings tab.
- Here, you’ll find the Metric setting. This determines the priority of your network adapters: lower values get higher priority.
- Change the Metric value for the PIA TAP adapter to a lower number (e.g., 1 or 10). This ensures that Windows gives priority to the VPN connection over other network connections (like your regular Wi-Fi or Ethernet).
- Click OK to apply the changes.
5. Disable other network adapters (optional). In the Network Connections window, right-click on other network adapters and select Disable. This forces Windows to prioritize the PIA TAP adapter, so it stays connected without interference from other adapters.
Configuring PIA With WireGuard
In some cases, the PIA app may not be available for a specific device or platform (e.g., certain routers or custom operating system setups). The native WireGuard app provides a way to use PIA’s servers on these devices via manually configured profiles.
Also, the native WireGuard app is simpler and less resource-intensive than the PIA app. It’s an open-source software, independently audited and highly regarded for its security and transparency. To use PIA with WireGuard, follow these steps:
- Generate WireGuard configuration files. Log in to your PIA account through the Client Control Panel. Navigate to the WireGuard configuration section, select a server location, and generate the configuration file. This file will include essential information like the server address, private key, and port settings. Download and save the.conf file securely.
- Install the WireGuard app. Download and install the official WireGuard app for your operating system from the WireGuard website. The app is lightweight and supports Windows, macOS, Linux, Android, and iOS.
- Import the configuration. Open the WireGuard app and click Import Tunnel (or a similar option based on your OS). Select the.conf file you downloaded from PIA. The app will load the configuration, creating a new tunnel profile for the chosen server.
- Connect to the VPN. Activate the tunnel by toggling the connection switch in the WireGuard app. Your internet traffic will now be routed securely through the PIA server using the WireGuard protocol.
- Additional configurations (optional). If you need to modify settings, such as DNS or allowed IPs, open the imported tunnel profile in the WireGuard app and edit the configuration. Be cautious, as incorrect changes may disrupt your VPN connection.
Using PIA With the Native OpenVPN App
The OpenVPN app is a universal tool for connecting to PIA servers. It’s ideal for platforms like unsupported Linux distributions, custom networks, or embedded systems. Follow these steps to set up PIA with the OpenVPN app:
- Download the OpenVPN app. Visit the official OpenVPN website and download the OpenVPN client for your operating system. Install the app by following the on-screen instructions.
- Get PIA OpenVPN configuration files. Log in to your PIA account on its Client Support Portal. Navigate to the section for manual OpenVPN configuration. Select your desired server location and download the.ovpn configuration files, which include the server address, encryption settings, and connection parameters.
- Import configuration files. Open the OpenVPN app and select the option to import a configuration file. Locate the.ovpn file you downloaded from PIA and load it into the app. You may need to repeat this process for multiple server locations if you want quick access to different regions.
- Enter your credentials. After importing the configuration, the app will prompt you to enter your PIA username and password. These can be found in your PIA account dashboard or email confirmation. Save the credentials if you want the app to remember them for future connections.
- Connect to the VPN. In the OpenVPN app, select the imported configuration and click Connect. Once connected, your internet traffic will be encrypted and routed through the PIA server specified in the configuration file.
- Adjust the settings (optional). The OpenVPN app allows for additional customization, such as setting up automatic reconnection, enabling the kill switch, or changing the protocol (TCP/UDP). These settings can be adjusted in the app’s preferences for optimized performance or security.
Installing PIA on a Windows Server
Installing PIA on Windows Server requires a few additional steps compared to a typical Windows desktop installation, particularly for optimizing performance and managing network configurations. First, enable the Remote Access role through Server Manager. You might also need to configure Windows Firewall to allow VPN traffic on both public and private networks.
- Install PIA using the standard installer on its website. Run the installer and follow the prompts to complete the setup, ensuring you provide administrative privileges during installation. Once the installation is complete, log in with your PIA account credentials within the app, select a server location, and connect to establish an encrypted VPN session.
- Prioritize the PIA TAP adapter for all traffic to be routed securely through the VPN. Navigate to Network and Sharing Center > Change Adapter Options, right-clicking the adapter, and adjusting the metric value in its advanced TCP/IP settings. The process is outlined here.
- Enable port forwarding in the PIA app settings if your server needs inbound connections. Configure the required ports for services like web hosting, file sharing, or remote desktop access. Additionally, if your server runs roles like DHCP, DNS, or Active Directory, ensure the VPN does not interfere with these services by selectively routing traffic or binding these roles to specific network adapters.
Common PIA Installation Issues and Solutions
Several common installation problems can occur when setting up PIA on Windows, from basic connectivity issues to complex driver conflicts. Here are the most frequent problems and their solutions. For persistent issues, I recommend contacting PIA's support team.
TAP Adapter Issues
These are the most common causes of PIA installation failures on Windows. Other VPNs, network software, or even older versions of PIA might leave conflicting TAP drivers on your system. These conflicts can prevent the new PIA client from successfully installing its own TAP adapter or cause it to malfunction. Here's how to resolve them:
- Uninstall existing TAP adapters. Open Device Manager, expand Network Adapters, right-click any existing TAP adapter and select Uninstall.
- Clean reinstall TAP drivers. Download fresh TAP drivers from PIA's website and install them before attempting the VPN installation again.
- Check system compatibility. Windows 7 users may need to update their system to support newer TAP driver versions.
Network Adapter Conflicts
Other network adapters can prevent PIA from functioning properly after installation. To fix that:
- Disable conflicting adapters. Some VPN adapters from other services can interfere with PIA. Disable them through Network Connections.
- Reset network settings. Open Windows PowerShell as administrator and run the network reset command to clear problematic configurations.
- Update network drivers. Outdated network card drivers can cause connection issues. Update them through Device Manager.
Antivirus Blocks
Security software like antivirus often blocks VPN installations to protect against unauthorized network changes.
- Temporarily disable antivirus. Turn off your security software during installation, then re-enable it afterward.
- Add PIA to exceptions. Create exclusions in your antivirus for PIA's installation directory and processes.
- Check Windows Defender. Windows' built-in security can also block VPN software. Add PIA to its allowed apps list.
Connection Issues
If PIA won't connect after a successful installation, try these fixes:
- Check Windows services. Verify that the PIA service is running in Windows Services.
- Reset DNS settings. Flush your DNS cache and reset to default DNS servers.
- Test different protocols. Switch between OpenVPN and WireGuard protocols to find a stable connection.
Different VPN Protocols May Require Specific Fixes
- OpenVPN issues. Clear the OpenVPN TAP adapter and reinstall it through PIA's repair tool.
- WireGuard problems. Reset the WireGuard configuration file and generate new keys.
- PPTP/L2TP errors. Check if your Windows version supports these older protocols.
How to Uninstall PIA Completely From Windows
Uninstalling PIA from Windows can vary slightly depending on the installation method you used. Whether you installed PIA via the native Windows app, a manual configuration, or another approach, removing all associated files and settings is key to complete uninstallation.
If you installed PIA using its native Windows application:
- Go to Settings > Apps (for Windows 10/11)
- Find Private Internet Access in the list, and select Uninstall.
- Follow the prompts to remove the software.
- Check for leftover files in the installation directory (typically in C:\Program Files\Private Internet Access) and delete them manually if they exist.
If you set up PIA manually using OpenVPN or WireGuard:
Delete the configuration files and disconnect any associated virtual adapters. To do this:
- Locate and delete the .ovpn or.conf files you downloaded for PIA and stored during setup.
- Go to Network and Sharing Center > Change Adapter Settings, look for virtual network adapters installed during configuration, and remove them.
If you used a hybrid setup involving custom scripts or third-party software to manage PIA connections, make sure to disable or delete any startup tasks or scheduled jobs related to the VPN. Check the Task Scheduler, the system's startup programs, and any relevant directories for residual files or processes.
FAQs
Can I use PIA without installing software?
Yes, you can use PIA without downloading its native app. However, you'll miss out on important features like the kill switch and MACE ad-blocker that are only available through the app. You can configure PIA using Windows’ built-in VPN client. Still, installing the official software is recommended for better security and easier configuration.
Does PIA work on Windows phones?
PIA doesn't offer native support for Windows phones anymore. Microsoft discontinued Windows mobile operating systems, so VPN providers have stopped developing apps for the platform. However, you can still use your phone’s built-in VPN settings, but you’ll most likely be limited to IPSec or L2TP security protocols.
Can I install PIA on Windows 7?
No, you can’t install PIA’s native app on Windows 7. PIA doesn’t support Windows XP, Vista, Windows 7, and Windows 8 anymore, as these operating systems are no longer receiving security patches from Microsoft. While downloading the native app is the easiest way to set up PIA, you need to use another method for Windows 7. For example, you can configure it on a router and connect your device to it, or install PIA manually using your device’s built-in VPN settings.
Does Private Internet Access have a free trial?
Yes, PIA does have a free trial, but only for mobile devices. Visit the Google Play Store (for Android) or the Apple App Store (for iOS) and download the VPN app. Once your account is set up, the 7-day free trial will start automatically. If you’ve set up PIA by downloading the app from its official website, you won’t get a free trial. However, PIA offers a 30-day money-back guarantee, which functions as a risk-free way to test the service.


Please, comment on how to improve this article. Your feedback matters!